In the fast-evolving realm of video editing, CapCut has emerged as a powerful tool for content creators. As we strive for inclusivity in our content, adding autocaptions to your videos becomes paramount. Autocaptions not only make your content accessible to a wider audience but also contribute to improved SEO. In this comprehensive guide, we’ll walk you through the process of seamlessly incorporating autocaptions into your CapCut projects, whether you’re using the PC version or the mobile app. Discover how to enhance both accessibility and search engine visibility by optimizing your content with autocaptions in CapCut.
Why Autocaptions Matter
Before we dive into the tutorial, let’s understand the significance of autocaptions. In a world where content is consumed across diverse platforms and by individuals with varying abilities, providing captions ensures that your message is accessible to everyone. Moreover, search engines like Google consider captions as valuable metadata, contributing to better search rankings. So, let’s get started on making your content more inclusive and discoverable.
Watch Here How To add Autocations in Pc
Adding Autocaptions in CapCut PC
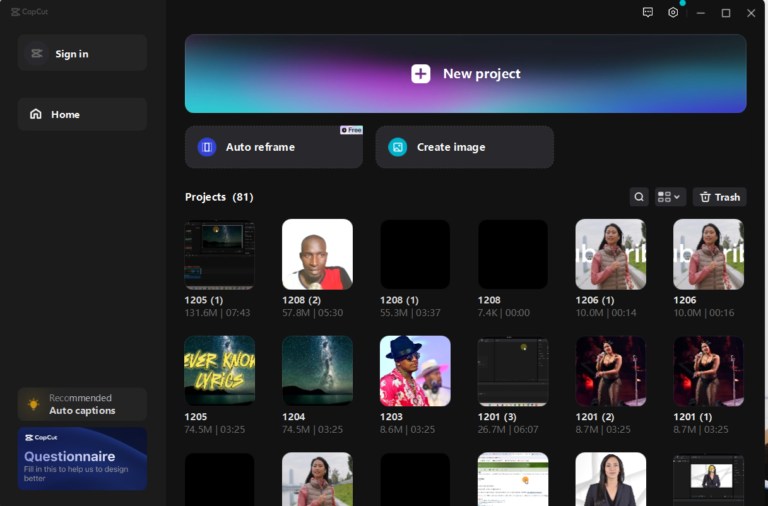
Step 1: Open Your Project
Launch CapCut on your PC and open the project you’re working on or start a new one.
How to Add Autocaptions In Capcut
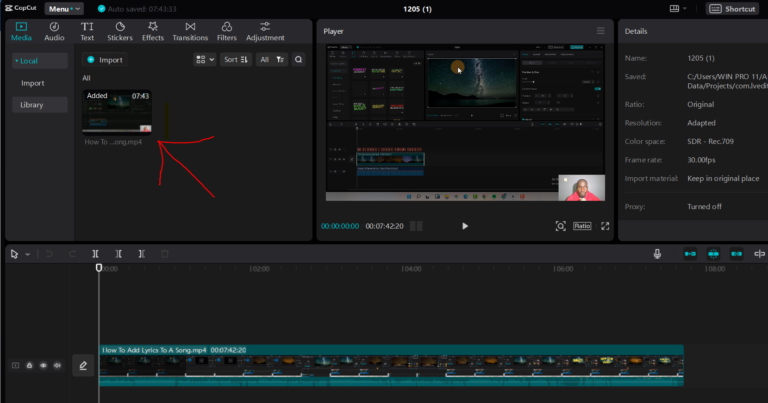
Step 2: Import Your Video
Import the video you want to edit. Ensure your video is well-organized, and the content is final before proceeding.
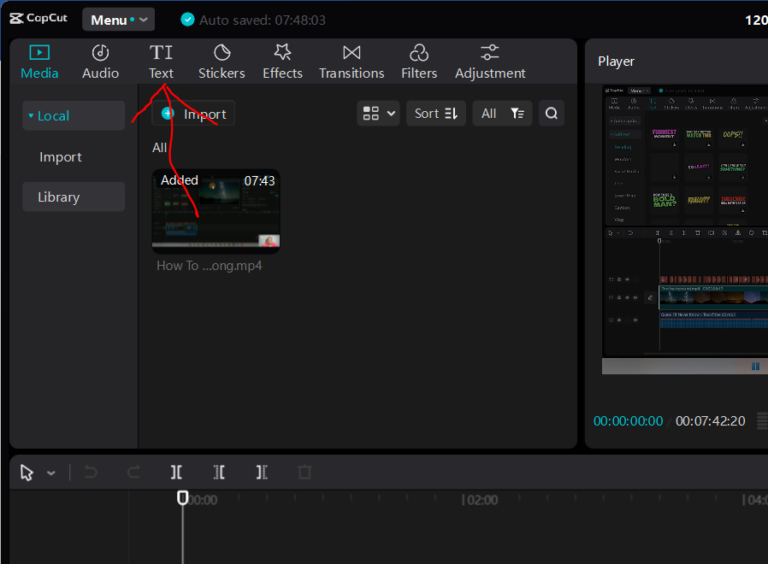
Step 3: Access the Text Editing Panel
Navigate to the toolbar and locate the “Text” option. Click on it to access the text editing panel.
How to Add Autocaptions In Capcut
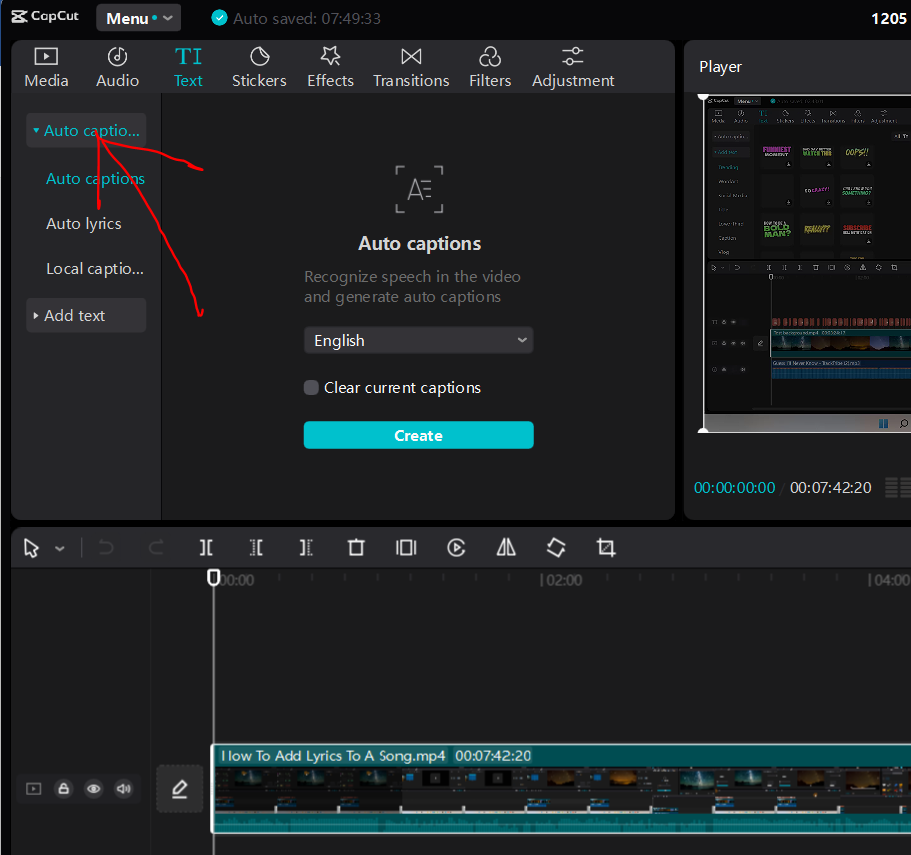
Step 4: Generate Autocaptions
Look for the autocaption feature within the text editing panel. Click on it, and CapCut will automatically generate captions based on the audio in your video.
Autocations
Step 5: Review and Edit
CapCut’s autocaption feature is quite accurate, but it’s always a good practice to review and edit the captions for any inaccuracies. Ensure the captions align with the spoken content and make corrections as needed.
Step 6: Export Your Video
Once you’re satisfied with the autocaptions, proceed to export your video. CapCut will embed the captions into your final export.
Adding Autocaptions in CapCut App
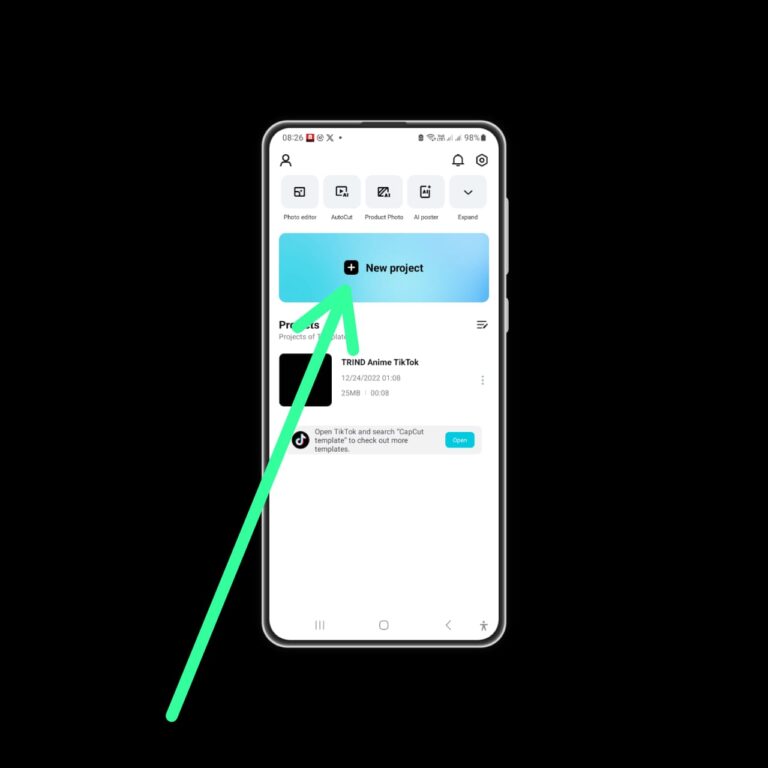
Step 1: Open the CapCut App
Launch the CapCut app on your mobile device and either open an existing project or start a new one.
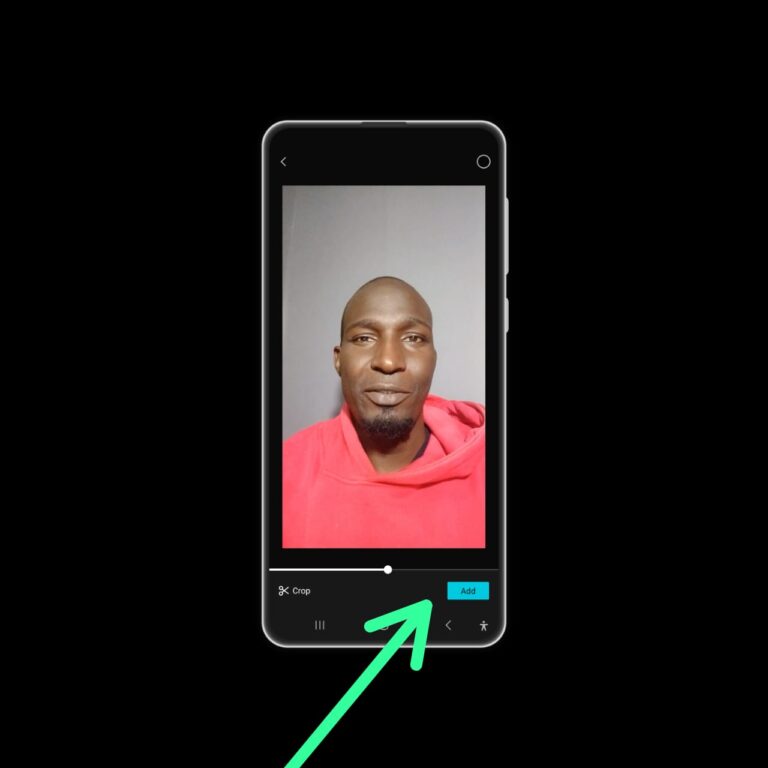
Step 2: Import Your Video
Import the video you want to edit into the app.
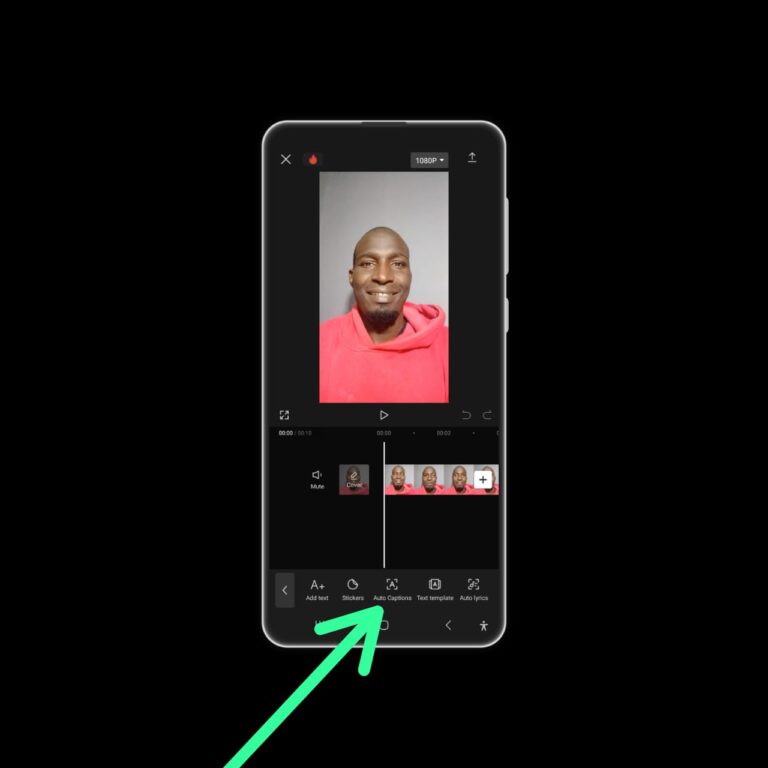
Step 3: Access the Text Editing Features
Locate the text editing features within the app. You’ll find the autocaption option here.
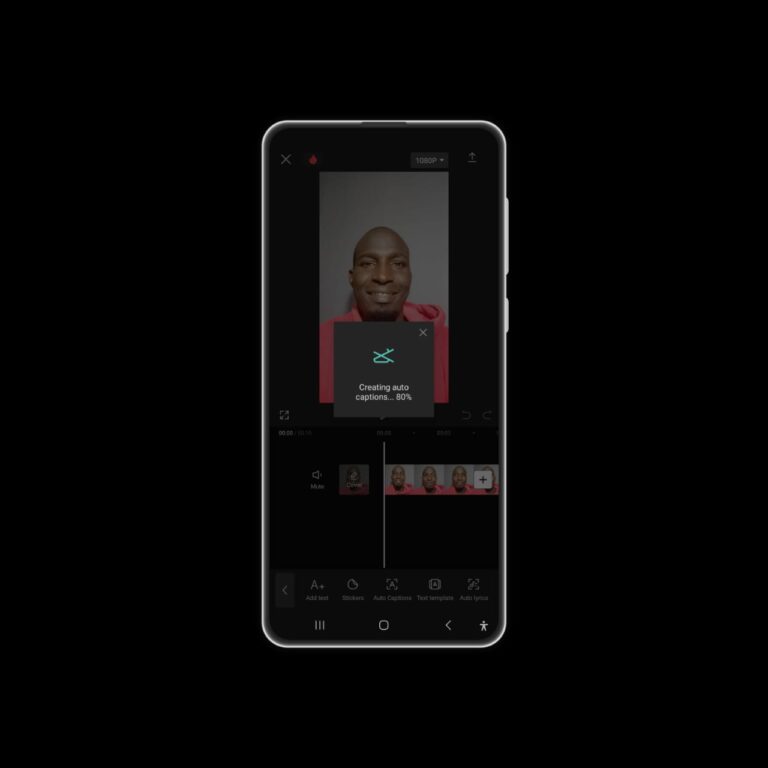
Step 4: Generate Autocaptions
Tap on the autocaption option, and CapCut will automatically generate captions based on the audio in your video.
Step 5: Review and Edit
Similar to the PC version, review and edit the autocaptions as needed to ensure accuracy.
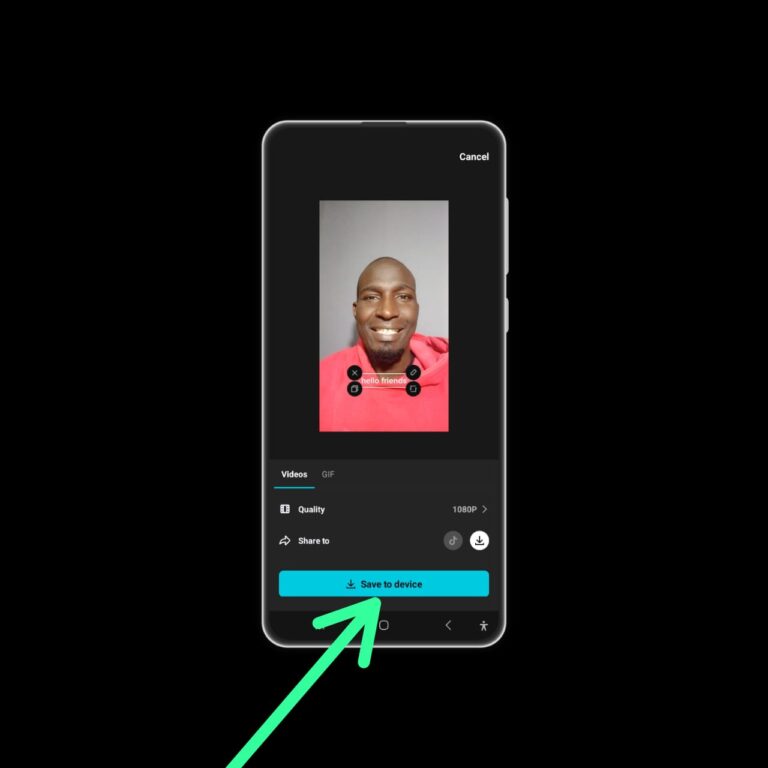
Step 6: Save or Share Your Video
Once you’re satisfied with the autocaptions, save your project or share the video directly from the CapCut app.
Step 6: Save or Share Your Video
Once you’re satisfied with the autocaptions, save your project or share the video directly from the CapCut app.
Conclusion
By incorporating autocaptions into your CapCut projects, you’re not only enhancing accessibility but also boosting your content’s SEO. In a digital landscape that values inclusivity, mastering the art of adding autocaptions is a step towards creating content that resonates with a broader audience. Elevate your video editing game with CapCut, making your content not only visually engaging but accessible to all.